Help Documentation

Computer and Software Documentation

Enterprise Enrollment

To enroll a Chromebook in an enterprise domain, verify you have an active Chrome Enterprise license, power on the device to reach the welcome screen, and press Ctrl+Alt+E to sign in with your admin credentials.

Preparation and Requirements

  • Ensure the Chromebook is on the initial welcome screen or perform a factory reset (Powerwash) if it has already been set up.
  • Confirm you have available unassigned Chrome Enterprise/Education Upgrade licenses in your Google Admin Console.
  • Connect the Chromebook to a working Wi-Fi network.


Enrollment Steps

  • Turn on the Chromebook and get to the main “Welcome” or network screen.
  • Do not log in normally. Press Ctrl + Alt + E on your keyboard to open the enterprise enrollment screen.
  • Type the username and password for an administrator account (or a user account with specific enrollment permissions) from your organization.
  • Click Enroll Device or Next.
  • Verify the confirmation message showing enrollment is complete, then click Done.

Kiosk App Setup

To enroll a Chromebook in an enterprise kiosk setup, you need a factory-reset device, a Chrome Enterprise/Kiosk Upgrade license, and your Google Admin console credentials. The core steps involve resetting the device, using the enterprise enrollment shortcut, and configuring the kiosk app policy.

Prepare the Device and Licenses

  • Powerwash: If the Chromebook has been used or signed into before, reset it to factory defaults by pressing Ctrl + Alt + Shift + R at the login screen.
  • Check Licenses: Verify you have an available Kiosk & Signage Upgrade or Chrome Enterprise Upgrade active in your Google Admin console.
  • Connect Power and Network: Turn on the fresh or reset Chromebook, connect to your Wi-Fi or Ethernet network, and accept the terms of service.


Enroll the Chromebook

(Follow steps on this page)

Configure Kiosk Mode in the Admin Console

  • Navigate to Settings: Sign into the Google Admin console.
  • Go to Devices: Click Devices > Chrome > Apps & extensions > Kiosks.
  • Select Organization Unit: Pick the correct Organizational Unit where you enrolled the device.
  • Add App: Click the plus icon to add your specific kiosk app or web application by ID or URL, then enforce the auto-launch policy so the app starts immediately when the device boots.


Configure the Web URL in Google Admin

  1. Open Kiosk Settings: Sign into the Google Admin console, then navigate to Devices > Chrome > Apps & extensions > Kiosks.
  2. Select Your OU: Click on the specific Organizational Unit (OU) on the left menu where your enrolled Chromebooks are located.
  3. Add the URL: Hover over the yellow plus (+) icon in the bottom right corner and select Add by URL.
  4. Enter Details: Type in the complete website address (e.g., https://example.com), choose your preferred installation type (such as Open in full screen), and click Save.


Enable Auto-Launch Policy

  • Find the Setting: In the same Kiosk window, look for the Auto-launch app dropdown menu at the top of the settings panel.
  • Select Your Web App: Change the dropdown from “None” to the specific Web URL/App you just added.
  • Save Changes: Click the Save button in the top right corner to push the policy to your devices.
  • Reboot Device: Restart your Chromebook; it will now download the policy and immediately boot into your designated website. 
Google Admin Console - Remote Management Tools

Login page: https://admin.google.com

Device Management

In the left panel: Devices > Chrome > Devices

  • Click on a Device (listed by location)
  • Click on the Serial Number
  • You’ll see options on the left panel to control the computer remotely > Reboot and ScreenShot
  • In the main window you can see the status of the OS and Hardware


Device Settings

In the left panel: Devices > Chrome > Settings

This is where you can control settings on each computer.

  • If a computer is going to sleep you can search for settings like Sleep Mode, Idle, Screen Saver, Power Save Mode, Eco Mode, etc.
  • You can also control screen resolution and orientation.
  • After changing any settings you must reboot the computer for them to take effect.

Directory Location Access

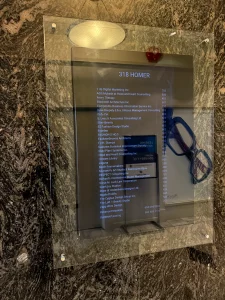
318 Homer (Upper)

To access the screen and computer:

  1. Remove glass by unscrewing the standoff covers.
  2. Door opens from the right
  3. To remove the screen lift and pull forward
  4. Computer is in the wall cavity
318 Homer (Lower)
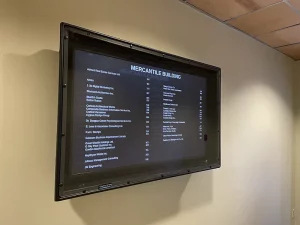
To access the screen and computer:

  1. Remove the security screws around the enclosure
  2. Remove the lexan face
  3. Screen can be removed by lifting and pulling forward
  4. Computer is located behind the screen.
  5. The power bar is located in the ceiling above the directory
788 Beatty
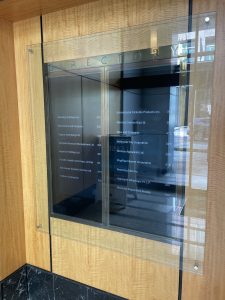
To access the screens and computers:

  1. Remove glass by unscrewing the standoff covers
  2. Door opens from the center
  3. To remove the screens lift and pull forward
  4. Computers are behind the screens
602 W Hastings
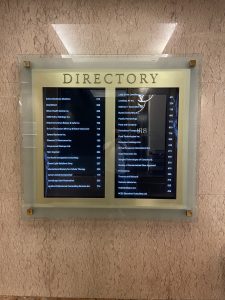
To access the screens and computers:

  1. Remove glass by unscrewing the standoff covers
  2. Remove the outer frame via screws top and bottom
  3. To remove the screens lift and pull forward
  4. Computers are in the wall cavity behind the screens
744 W Hastings
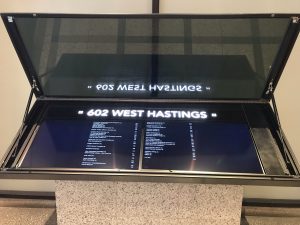
To access the screens and computers:

  1. Lift the glass door from the front lower edge
  2. Computers and cords are located under the black cover on the right
  3. Screens are set side by side within the case
564 Beatty
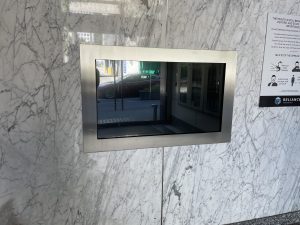
To access the screen and computer:

  1. The frame is double sided taped to the wall so you need to cut the tape
  2. Pull out the frame evenly on all sides
  3. Screen is on a fully articulating mount and can be adjusted in all directions
  4. Computer is located within the wall cavity
402 W Pender
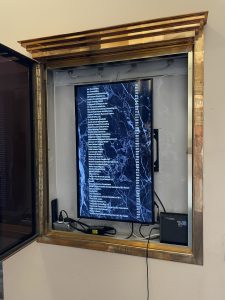
To access the screen and computer:

  1. The frame has a lock and key – lock pulls out to the right
  2. Everything is located within the frame
837 Beatty
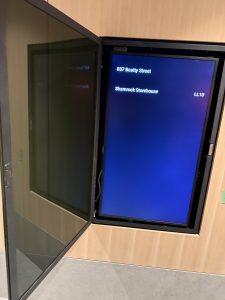
To access the screen and computer:

  1. Door opens from the right via magnet
  2. Screen can be removed by lifting and pulling forward
  3. Computer is located behind the screen